Full-Stack Deployment on NEXUS AI: Frontend, Backend, and Database in One Command
Deploy a complete application stack on NEXUS AI with auto-provisioned PostgreSQL, MySQL, MongoDB, or Redis. NEXUS AI generates the Compose file, injects credentials, and wires your services together automatically.
By Platform Super Admin • • devops
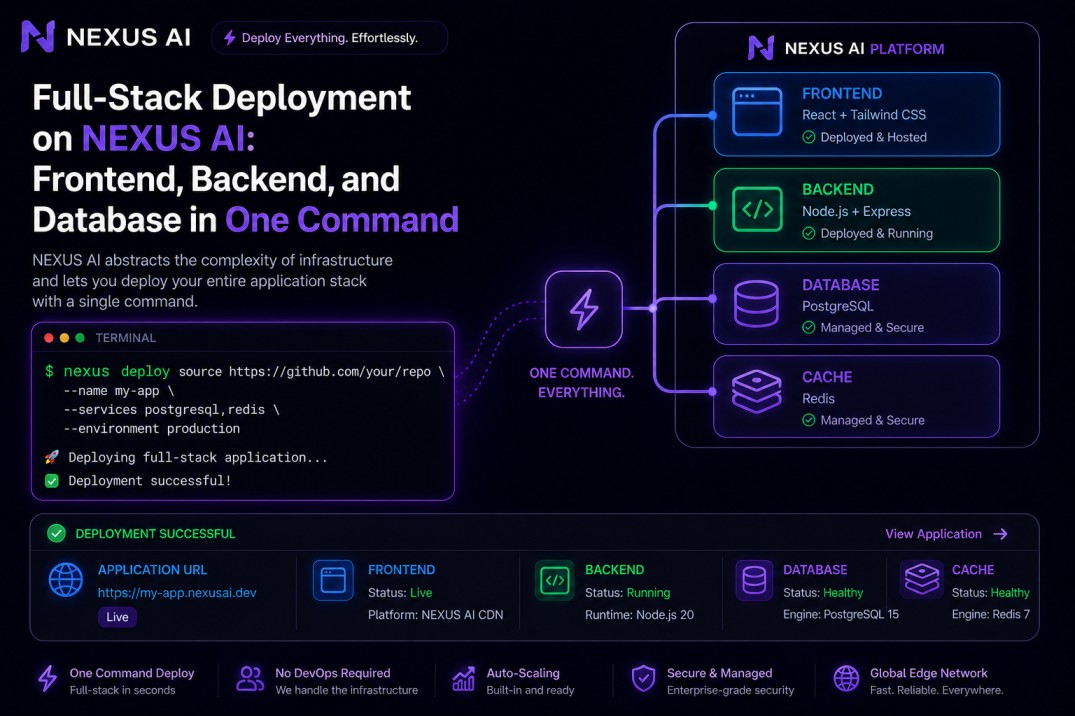
Shipping a full-stack application used to mean writing a Compose file by hand, generating passwords, wiring service names into environment variables, and hoping the health checks fired in the right order. NEXUS AI handles all of that. One command deploys your code alongside a database, connects them on a private network, and injects the credentials your app needs to connect.
How it works
When you deploy from source using nexusai_deploy_source (or nexus deploy source in the CLI) with a services array, NEXUS AI calls composeService.ts internally to generate a docker-compose.yml for your stack. Every service runs in the same private Docker network (deploy-network-{deploymentId}), so your app container reaches the database by service name rather than IP address.
Database volumes are named {serviceType}-data-{deploymentId} and persist across container restarts and redeploys. Your data survives unless you explicitly destroy the deployment.
Health checks gate startup. Your application container does not start until the database passes its readiness check:
- PostgreSQL:
pg_isready - MySQL:
mysqladmin ping - MongoDB:
mongosh --eval db.adminCommand("ping") - Redis:
redis-cli ping
This means your app never boots into a state where the database is still initializing.
Database credentials are generated at deploy time with random passwords. You do not set them. NEXUS AI injects them directly into your containers as environment variables.
Supported database services
| Service | Image | Default version |
|---|---|---|
| PostgreSQL | postgres |
15-alpine |
| MySQL | mysql |
8.0 |
| MongoDB | mongo |
7 |
| Redis | redis |
7-alpine |
Deploying from source with a database
Via the CLI
nexus deploy source --repo https://github.com/your/repo \
  --name my-app \
  --services postgresql \
  --environment production \
  --provider docker
  --json
Multiple services:
nexus deploy source https://github.com/your/repo \
  --name my-app \
  --services postgresql,redis \
  --environment production
Via the MCP tool
{
  "tool": "nexusai_deploy_source",
  "input": {
    "repoUrl": "https://github.com/your/repo",
    "name": "my-app",
    "environment": "PRODUCTION",
    "services": [
      { "type": "postgresql" },
      { "type": "redis" }
    ]
  }
}
NEXUS AI clones the repo, builds the image, generates the Compose file, and brings everything up in one job.
Connecting to the database from your app
Auto-injected environment variables
When NEXUS AI provisions a database service, it injects connection variables into every container in the stack automatically. You do not configure these. Read them from process.env (Node.js), os.environ (Python), or however your framework reads environment variables.
PostgreSQL
POSTGRES_HOST      postgresql
POSTGRES_PORT      5432
POSTGRES_DB        appdb
POSTGRES_USER      appuser
POSTGRES_PASSWORD  <generated>
Node.js example:
const { Pool } = require('pg');

const pool = new Pool({
  host: process.env.POSTGRES_HOST,
  port: parseInt(process.env.POSTGRES_PORT),
  database: process.env.POSTGRES_DB,
  user: process.env.POSTGRES_USER,
  password: process.env.POSTGRES_PASSWORD,
});
Prisma .env:
DATABASE_URL=postgresql://${POSTGRES_USER}:${POSTGRES_PASSWORD}@${POSTGRES_HOST}:${POSTGRES_PORT}/${POSTGRES_DB}
Or inline in schema.prisma:
datasource db {
  provider = "postgresql"
  url      = env("DATABASE_URL")
}
MySQL
MYSQL_HOST      mysql
MYSQL_PORT      3306
MYSQL_DATABASE  appdb
MYSQL_USER      appuser
MYSQL_PASSWORD  <generated>
Node.js example:
const mysql = require('mysql2/promise');

const pool = mysql.createPool({
  host: process.env.MYSQL_HOST,
  port: parseInt(process.env.MYSQL_PORT),
  database: process.env.MYSQL_DATABASE,
  user: process.env.MYSQL_USER,
  password: process.env.MYSQL_PASSWORD,
});
MongoDB
MONGO_HOST      mongodb
MONGO_PORT      27017
MONGO_DATABASE  appdb
MONGO_USERNAME  root
MONGO_PASSWORD  <generated>
Mongoose example:
const mongoose = require('mongoose');

mongoose.connect(
  `mongodb://${process.env.MONGO_USERNAME}:${process.env.MONGO_PASSWORD}` +
  `@${process.env.MONGO_HOST}:${process.env.MONGO_PORT}/${process.env.MONGO_DATABASE}`
);
Redis
REDIS_HOST  redis
REDIS_PORT  6379
ioredis example:
const Redis = require('ioredis');

const redis = new Redis({
  host: process.env.REDIS_HOST,
  port: parseInt(process.env.REDIS_PORT),
});
The host in every case is the service name on the internal Docker network. From inside your container, postgresql resolves to the Postgres container, mysql to MySQL, and so on. These hostnames are not reachable from outside the deployment.
Using the secrets vault for external databases
If you connect to a database that runs outside NEXUS AI (a managed RDS instance, a MongoDB Atlas cluster, a Redis Cloud endpoint), use the secrets vault instead of hardcoding credentials.
Step 1: Create a secret
nexus secret create \
  --name DATABASE_URL \
  --value "postgresql://user:[email protected]:5432/mydb" \
  --environment production
Step 2: Link it to your deployment
Pass the secret name when deploying:
nexus deploy source https://github.com/your/repo \
  --name my-app \
  --secret-ids <secret-id>
At deploy time, NEXUS AI decrypts the secret (AES-256-GCM) and injects it as an environment variable into the container. Secrets do not override variables you pass explicitly in --env. The lookup order is: explicit env vars first, then secrets.
Your application reads process.env.DATABASE_URL exactly as it would for any other environment variable. There is nothing special to configure in your code.
Rotating a secret
nexus secret update --id <secret-id> --value "new-connection-string"
nexus deploy redeploy <deployment-name>
The new value takes effect on the next deploy.
Frontend deployment
NEXUS AI Docker deployments run a single application container (plus database sidecar services). There is no built-in multi-container split for frontend and backend today.
Two patterns work:
Pattern 1: Serve the frontend from the backend
Build your frontend and serve the static files from your backend server. This is the simplest approach and fits most full-stack frameworks:
- Next.js — runs as a single Node.js server (
next start) that handles both SSR and API routes - Express + React — build the React app into
dist/, then serve it withexpress.static - Django + Vue — run
npm run buildin your Dockerfile, copydist/into Django's static files directory
Your Dockerfile handles the build:
FROM node:20-alpine AS frontend-build
WORKDIR /app/frontend
COPY frontend/package*.json ./
RUN npm ci
COPY frontend/ ./
RUN npm run build

FROM node:20-alpine
WORKDIR /app
COPY backend/package*.json ./
RUN npm ci --production
COPY backend/ ./
COPY --from=frontend-build /app/frontend/dist ./public
EXPOSE 3000
CMD ["node", "src/index.js"]
Pattern 2: Deploy frontend separately
Deploy the frontend as a separate NEXUS AI deployment (static site or Node.js server), and point it at the backend's public URL. Use nexus deploy status <backend-name> to get the backend URL, then pass it as an environment variable to the frontend deployment.
# Get backend URL
BACKEND_URL=$(nexus deploy status my-api --json | jq -r '.url')

# Deploy frontend pointing at backend
nexus deploy source https://github.com/your/repo \
  --name my-frontend \
  --env VITE_API_URL=$BACKEND_URL
What gets deployed
After nexus deploy source completes with a database service, you get:
- Your application container running on a public NEXUS AI subdomain
- One or more database containers on a private internal network
- Named volumes for each database (data persists across redeploys)
- Auto-generated credentials injected as environment variables
- Health checks configured and active
- A
lastBackupfield ready for daily automated backups (see the backup guide)
Run nexus deploy status <name> to see the full picture: URL, status, attached services, and their connection metadata.